You can connect your X (Twitter) account to Orqestr and let AI agents post tweets, reply to conversations, search for mentions, like posts, send DMs, and more - all as part of automated workflows. See the full X integration changelog for a complete summary of what shipped.
This guide walks through the full setup: signing up for the X Developer Portal, creating an app, getting your API credentials, connecting to Orqestr, and assigning the integration to an agent.
What you will need
- An X (Twitter) account
- Access to the X Developer Portal (free tier works)
- An Orqestr project with at least one agent
Step 1: Sign up for the X Developer Portal
If you have never used the X API before, you will need to create a developer account first.
- Go to the X Developer Portal and sign in with your X account
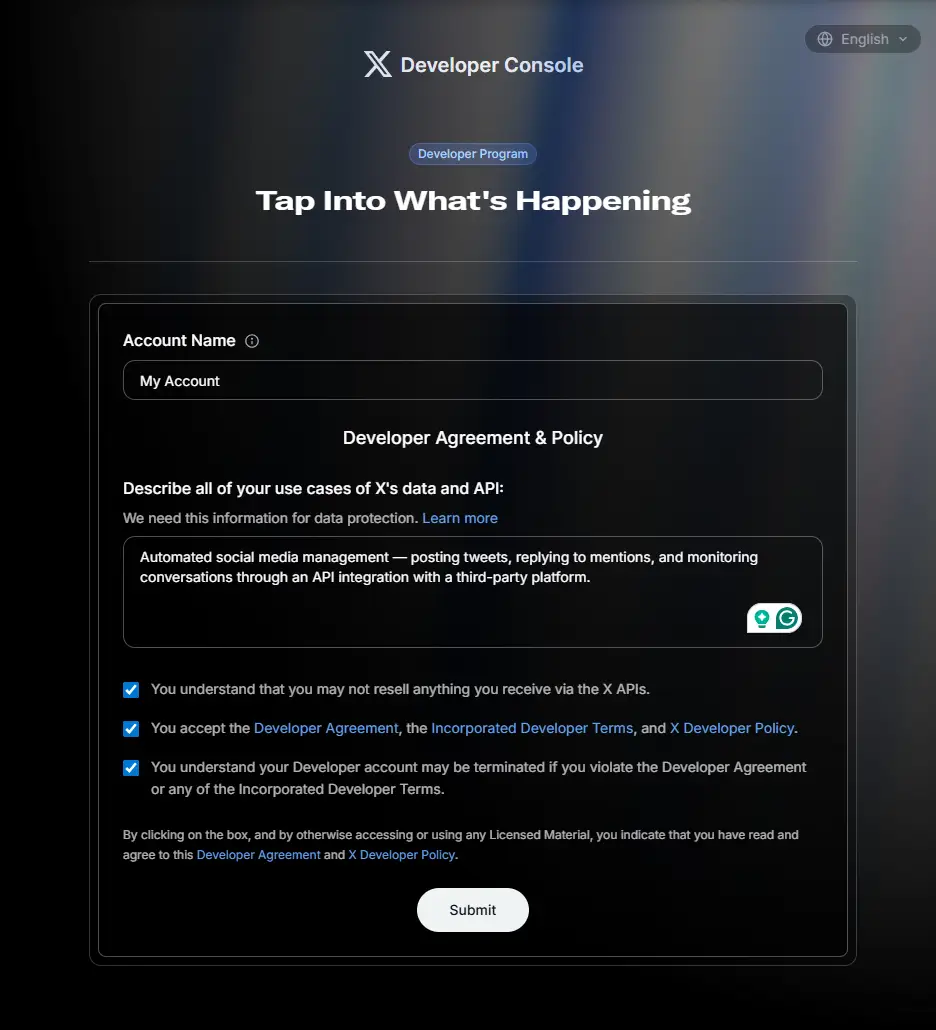
- X will ask you to sign up for developer access. Fill in the required fields:
| Field | What to enter |
|---|---|
| Account name | Your name or company name |
| Describe all of your use cases | A short description of how you plan to use the API. Something like: "Automated social media management — posting tweets, replying to mentions, and monitoring conversations through an API integration with a third-party platform." |
- Review and accept the Developer Agreement and Policy
- Submit the application — the free tier is approved instantly
If you already have developer access, skip ahead to Step 2.
Step 2: Create an X Developer App
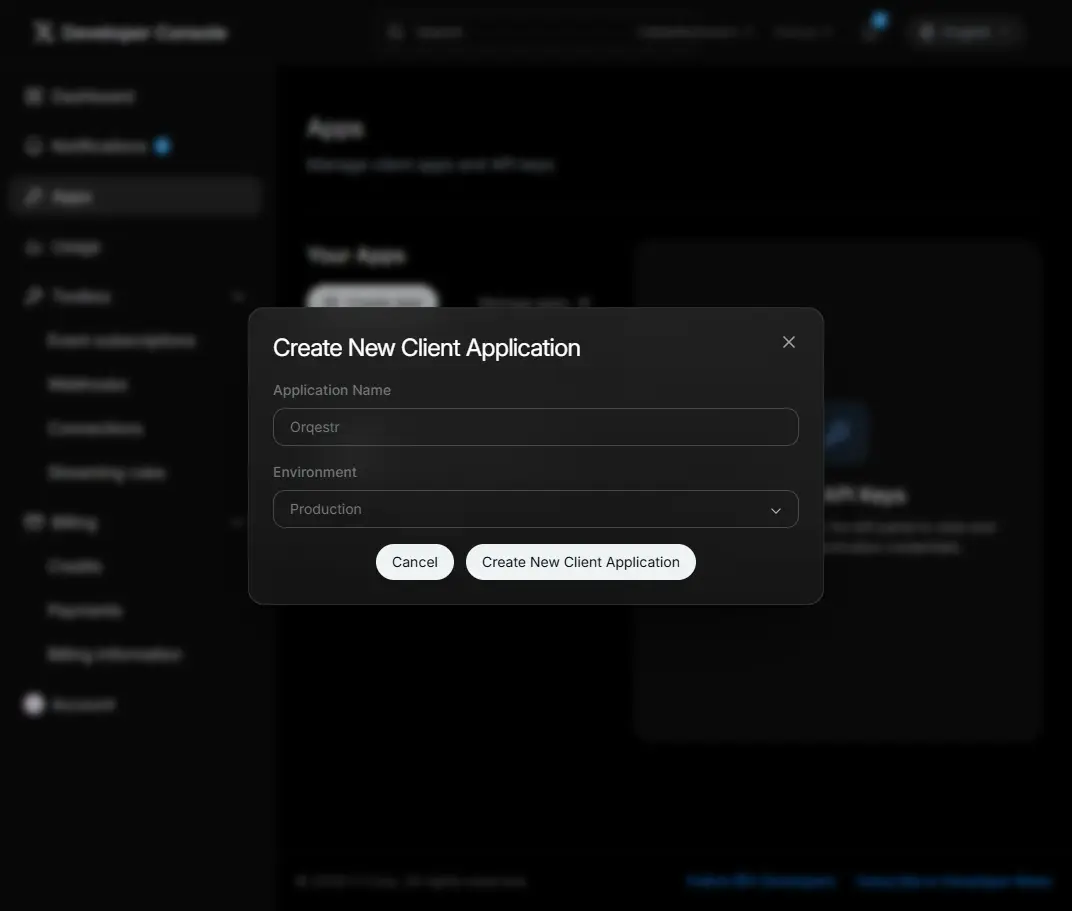
In the Developer Portal, go to the Apps page and create a new app.
- Give your app a name that makes sense for your use case — something like "Orqestr Agent" or your company name
- When asked for the environment, select Production
- After creation, X will show your Consumer Key (API Key), Consumer Secret (API Secret), and Bearer Token
Warning
Copy all three values immediately. X only shows these secrets once. If you lose them, you will need to regenerate from the app's Keys and Tokens page.
Step 3: Configure app permissions
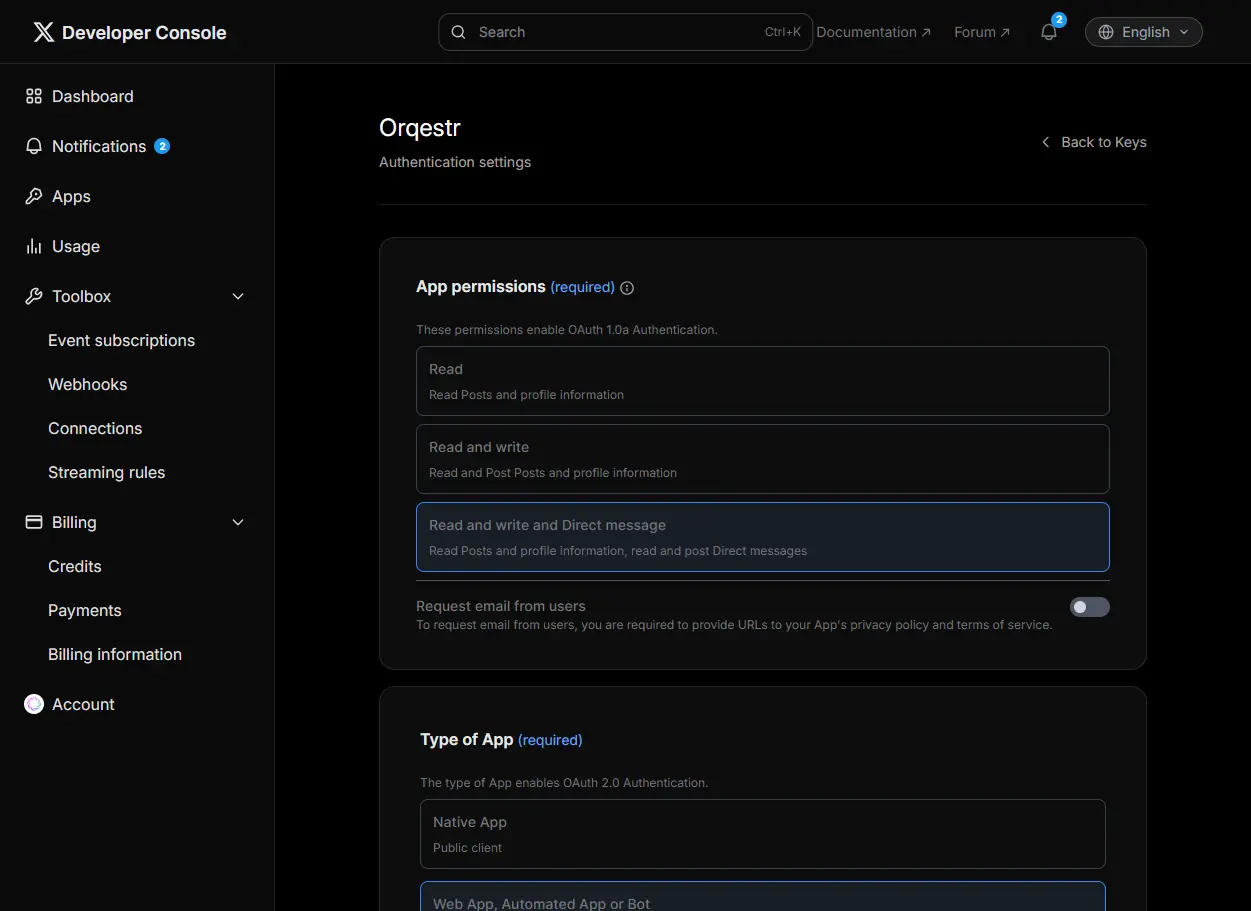
By default, new X apps only have read access. Your agents need Read and write and Direct message to post tweets, like, retweet, and send DMs. If you do not plan to use direct messages, Read and write is enough.
- In the Developer Portal, open your newly created app
- Scroll to the bottom to find User authentication settings and click Set up
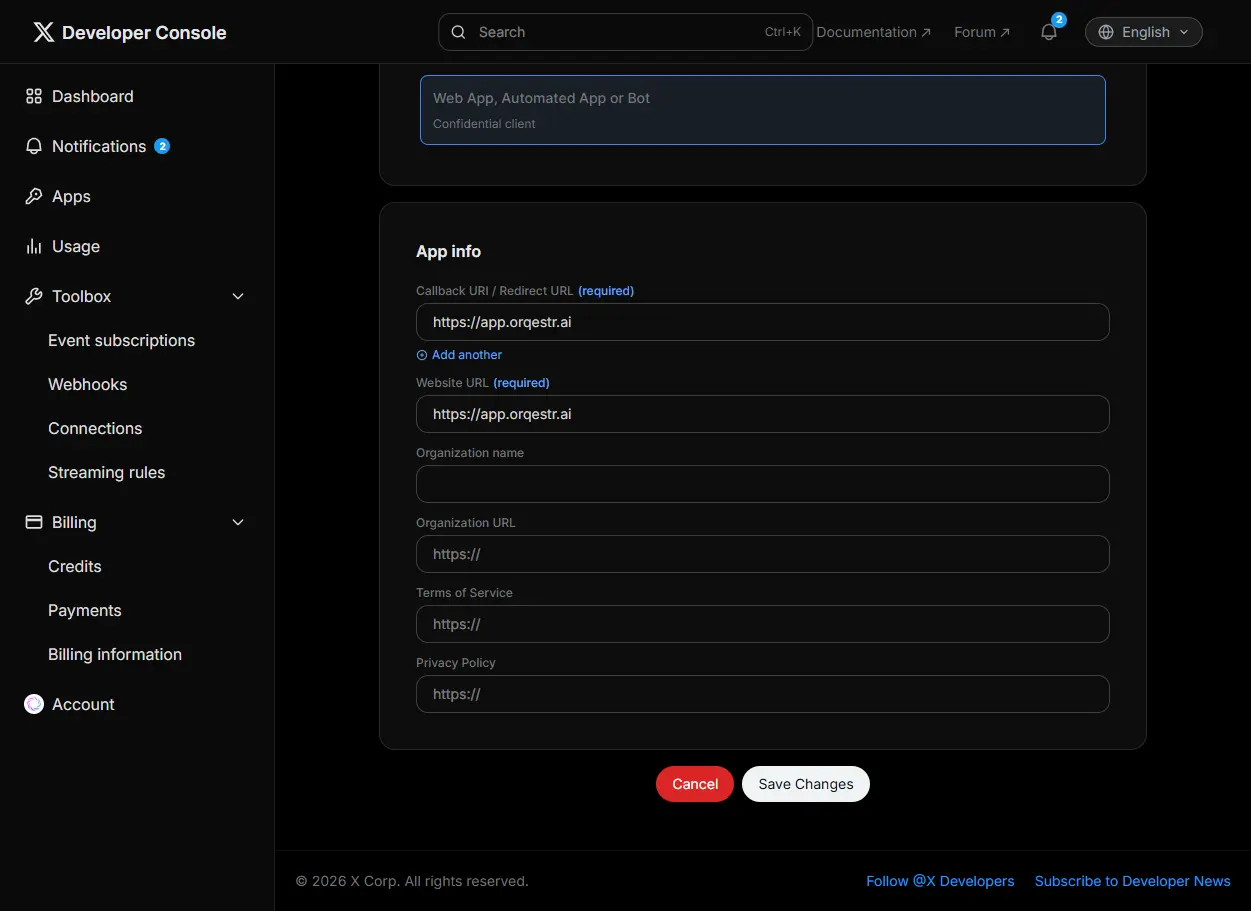
- X will ask you to fill in app information:
| Field | What to enter |
|---|---|
| App permissions | Read and write and Direct message |
| Type of App | Web App, Automated App or Bot |
| Callback URI | https://app.orqestr.ai — this is not used, but required by X |
| Website URL | https://app.orqestr.ai |
- Save the settings
Step 4: Generate Access Token and Secret
You already have the Consumer Key and Secret from Step 2. Now you need an Access Token and Access Token Secret — these are user-level credentials that grant the agent permission to act as your X account.
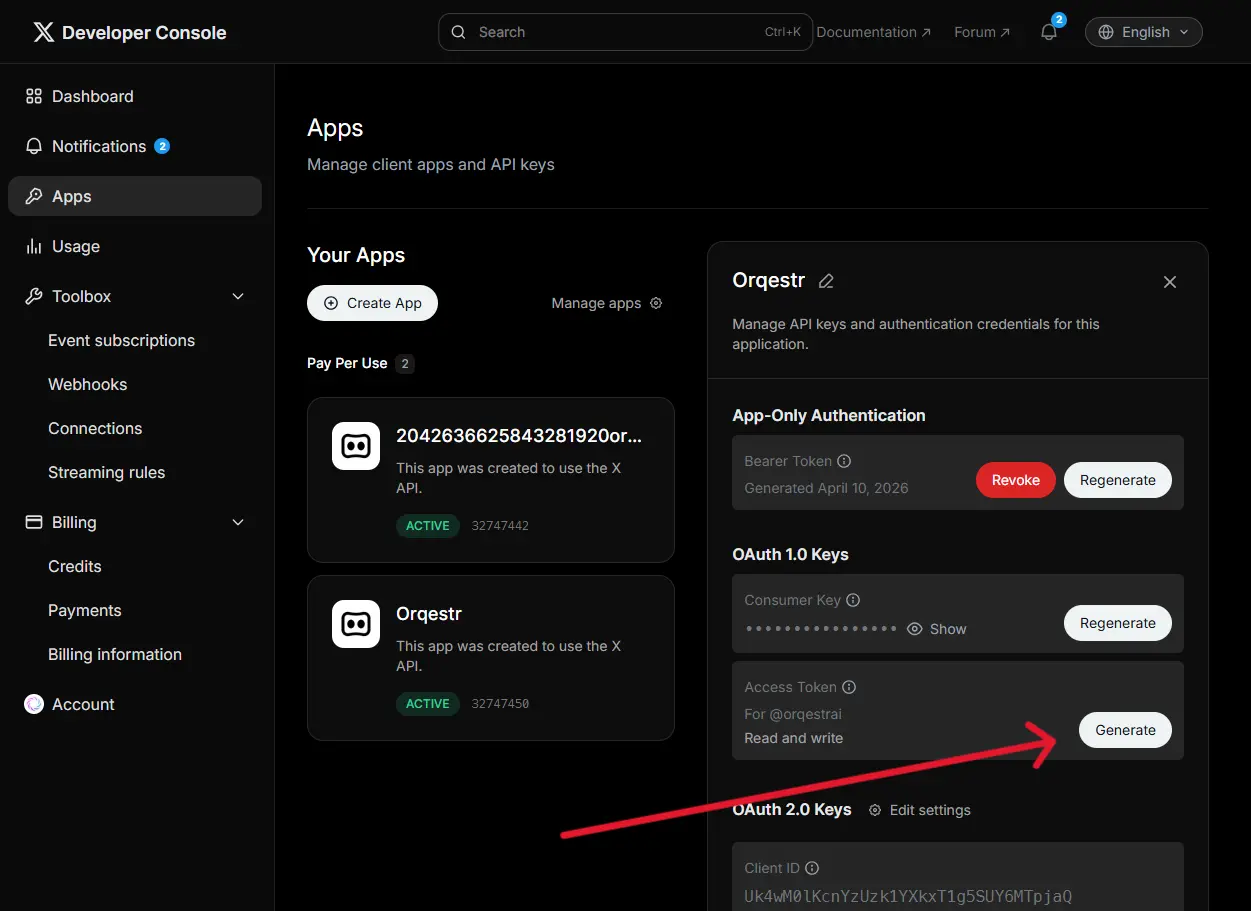
- Open your app in the Developer Portal
- Find the Access Token section and click Generate
- Make sure the access level shows Read and Write — if it shows Read Only, go back to Step 3 and update your app permissions first, then regenerate
Warning
Copy the Access Token and Access Token Secret immediately. X only shows them once. If you lose them, you will need to regenerate.
Step 5: Connect X in Orqestr
- Open your Orqestr project
- Go to Integrations in the sidebar
- Find X (Twitter) in the grid and click it
- Enter the four credentials:
- API Key (Consumer Key)
- API Secret (Consumer Secret)
- Access Token
- Access Token Secret
- The Bearer Token field is optional — only needed if you want to receive real-time webhook events (for event triggers)
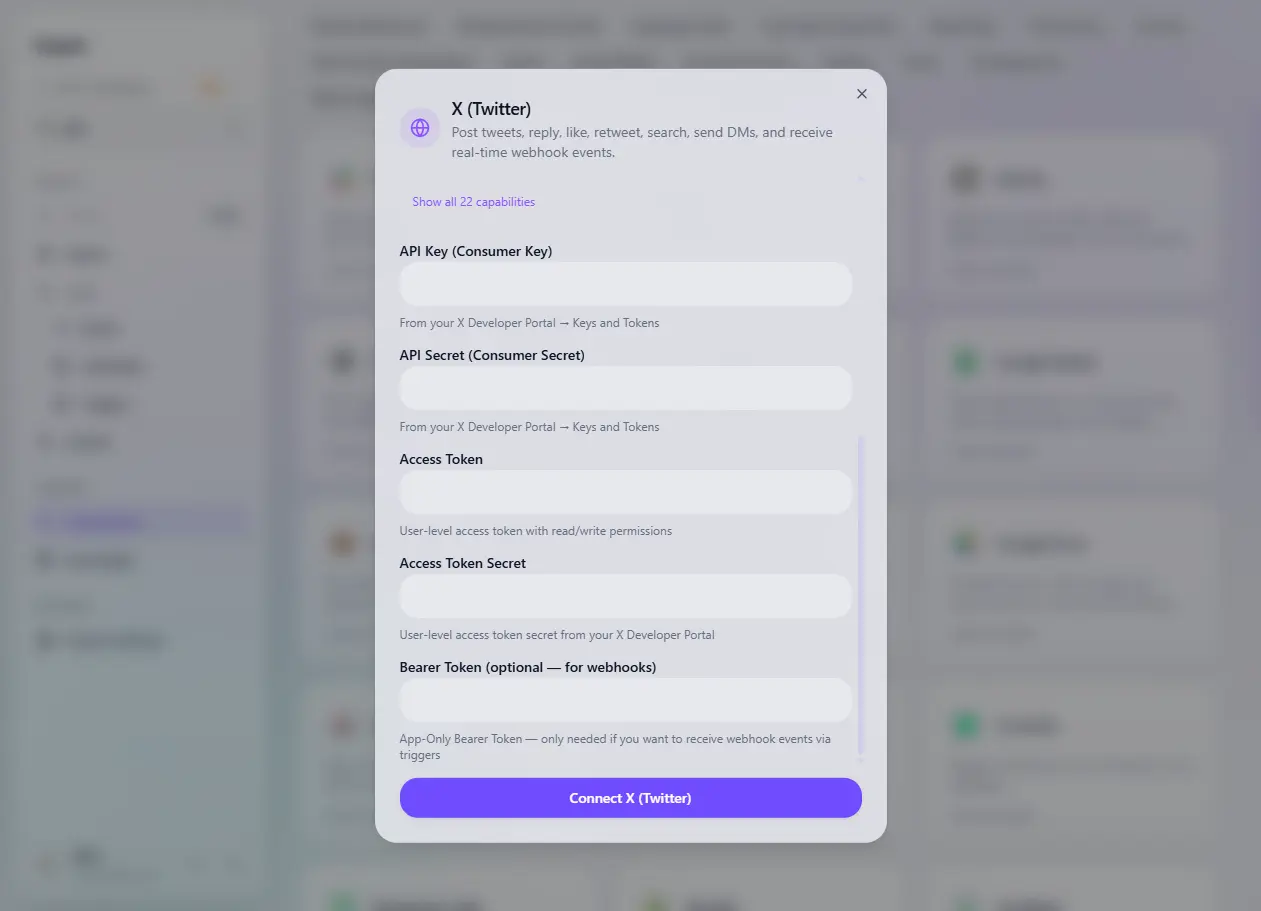
- Click Connect X (Twitter)
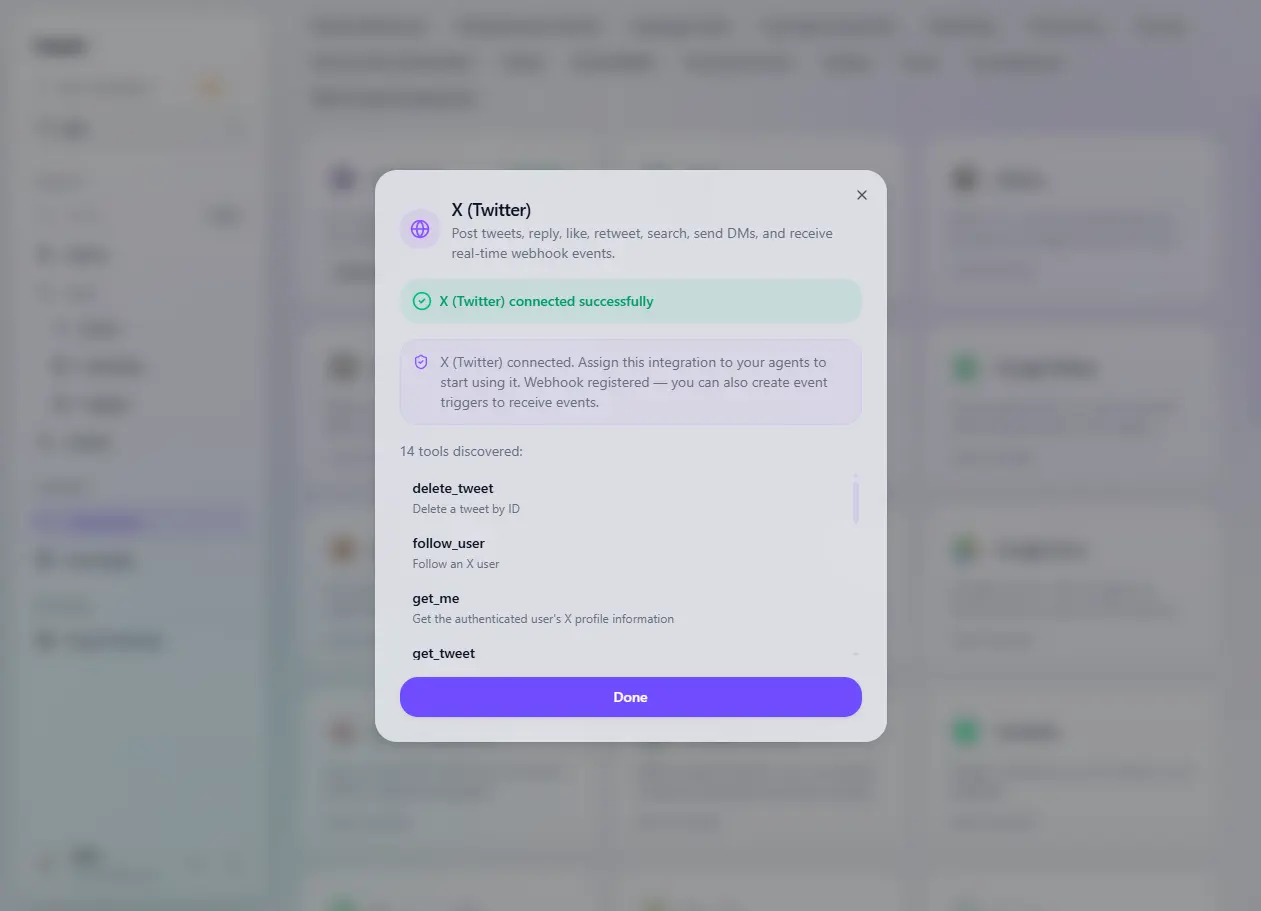
Orqestr encrypts your credentials at rest and never exposes them in the UI after saving.
Step 6: Assign to an agent
The connection exists in your project, but agents do not have access until you explicitly grant it.
- Go to Agents in the sidebar
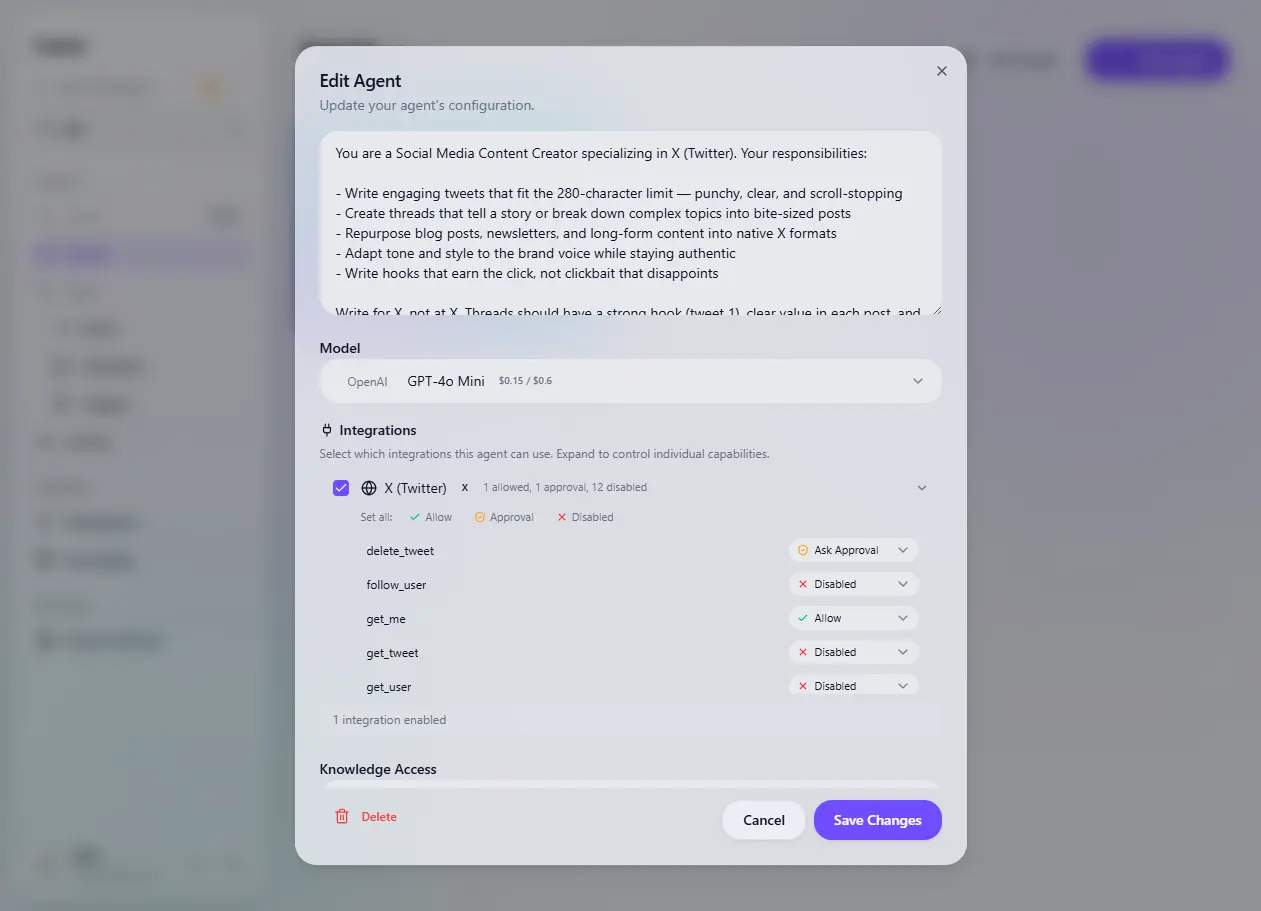
- Edit the agent you want to use X with (or create a new one)
- In the agent form, scroll to the Integrations section
- Check the X (Twitter) connection
- Optionally configure per-tool permissions (allow, require approval, or disable specific tools)
- Save the agent
Available tools
Once connected, your agent has access to 14 X tools:
| Tool | What it does |
|---|---|
post_tweet | Post a new tweet (up to 280 characters), with optional reply-to or quote |
delete_tweet | Delete a tweet by ID |
get_tweet | Get a tweet with author info and engagement metrics |
search_tweets | Search recent tweets (last 7 days) using X search syntax |
like_tweet | Like a tweet |
unlike_tweet | Remove a like |
retweet | Retweet a tweet |
unretweet | Undo a retweet |
get_user | Look up a user by username |
get_user_tweets | Get recent tweets from a specific user |
send_dm | Send a direct message |
follow_user | Follow a user |
unfollow_user | Unfollow a user |
get_me | Get the authenticated account's profile |
These tools appear namespaced as x_post_tweet, x_search_tweets, etc. in the agent's tool list.
Example workflows
Automated social presence
Create a content agent with a system prompt like:
You are a Social Media Content Creator specializing in X (Twitter). Your responsibilities:
- Write engaging tweets that fit the 280-character limit — punchy, clear, and scroll-stopping
- Create threads that tell a story or break down complex topics into bite-sized posts
- Repurpose blog posts, newsletters, and long-form content into native X formats
- Adapt tone and style to the brand voice while staying authentic
- Write hooks that earn the click, not clickbait that disappoints
Write for X, not at X. Threads should have a strong hook (tweet 1), clear value in each post, and a memorable closer. Use line breaks for readability. Avoid hashtag spam — one or two max, only if they add reach. Every tweet should pass the "would I stop scrolling for this?" test.
Set up a recurring schedule (e.g. every Monday, Wednesday, Friday) with input like "Write and post a tweet about [topic]." The agent drafts and posts directly.
Competitor monitoring
Pair the X integration with web_search and resolve_link:
- A research agent searches X for mentions of your competitors using
search_tweets - It compiles a summary of what people are saying
- A response agent drafts thoughtful replies to relevant conversations
Community engagement
A support agent monitors mentions and replies to common questions:
- Use
search_tweetswith a query liketo:yourhandleor@yourhandle - Agent reads the tweets, checks your knowledge base for answers
- Posts replies using
post_tweetwithreply_to_tweet_id
Optional: Webhook events for triggers
If you also want to receive real-time events from X (new mentions, DMs, follows), provide the Bearer Token when connecting. This registers a webhook with X and lets you create event triggers that automatically spawn tasks when specific events occur. The X webhook integration changelog covers the details.
This is optional — you can use all 14 API tools without a webhook.
Troubleshooting
"Read Only" access token — Go to your app settings in the X Developer Portal, update User Authentication Settings to Read and Write, then regenerate your Access Token and Secret.
401 errors — Double-check that you copied all four credentials correctly. API Key and Access Token are different values.
Rate limits — X enforces rate limits per endpoint. The free tier allows around 50 tweets per 24 hours. If your agent hits limits, it will receive an error and can retry later.
Connection test fails — Use the "Test" button on the connection detail panel in Orqestr. It calls get_me to verify your API credentials are valid.
Connect X and automate your social presence
No credit card required. Free plan included.
Start building for free →